This tutorial will help you use GitHub Pages to create a website. This tutorial should take between 30 and 60 minutes to complete. At the end of the tutorial, you will have the basis for your own website.
GitHub Pages is a static site hosting service offered for free by GitHub. Users are allowed one site per GitHub account or organization and can also create unlimited project sites.
In this tutorial, we will work through the steps to create a user website using GitHub Pages.
To complete this project, you will need to register for a free GitHub account. If you are a student or teacher, there are special benefits available to you through GitHub Education.
A repository is where you will collect and share all of the code and documents associated with your project. You can create a site in an existing repository, but for the purposes of this tutorial we will be working from a new repository.
To begin, create a new repository. You can create a new repository by clicking on the + symbol in the upper-right corner of any page and selecting New Repository.
If this is your first time creating a repository, you can click on the left side of the screen under Create your first project and select Create repository.
If you have created a repository before, then you can go to the Repositories tab at the top of the page, then select New from the upper right hand corner of the Repositories page.
Name this repository username.github.io, where username is your username on GitHub. Make sure that this exactly matches your username. If your username contains uppercase letters, you must lowercase the letters.
Setting your repository visibility to public will ensure that people can view all of the materials in your repository. They will also be able to fork your code. Forking means creating a copy of source code.
The entry file is the home page for your site. You will want to use an index.html, index.md, or README.md file as the entry file. For the purpose of this tutorial, we will use an index.html file.
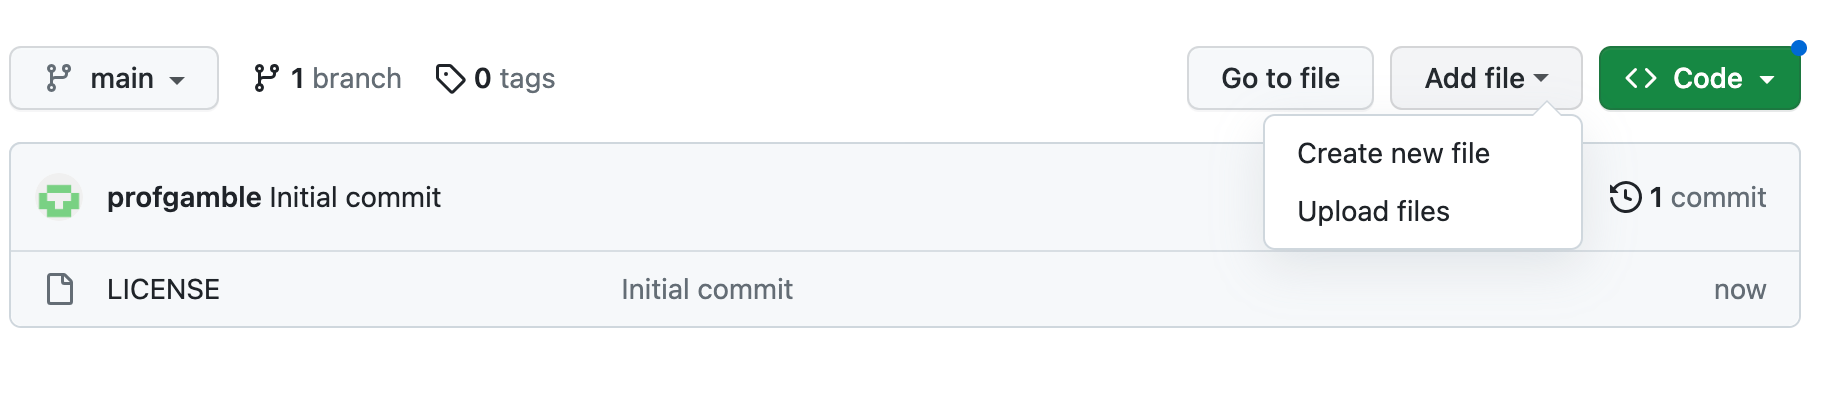
To create a new file, click on Create New File under the Add File tab.
If you have created an HTML file that you would like to use as your landing page, then you can upload it using the Upload Files selection. You can then rename the file index.html.
Whenever you make a change to a file, make sure to select Commit changes in the upper right corner to save your work. You can add an extended description to each change to help you remember what edits you made.
You can use the Upload files tool to upload all of the files that you want to display on your website, including any CSS that you will be applying to your HTML pages.
If you have created CSS files that you would like to use with your HTML, you can add those to your repository using Upload files. You will then use the address of the CSS file in your HTML documents to apply CSS to those pages.
To visit your site, go to username.github.io where username is your username.
To edit pages on your site, open the file. Then click on the pencil icon edit this file. When you have finished editing, make sure to Commit changes.
To unpublish your site, go to Settings, then Pages. At the top of the page, where it says your site is live, select Unpublish site.
To republish your site, go to Actions at the top of the page. Click on pages build and deployment. Then at the top of the screen select Re-run all jobs.
It may take a moment to republish your site. To check on the status, go to Actions. Here you can view if the job is still in progress.
The GitHub Pages documentation can provide you with information about other ways to customize your site, as well as troubleshooting information.
This OER was funded by the VILLA: Working in the Open Virtual Information Literacy Library Atelier sponsored by Iwasaki Library at Emerson College, held May 11-19, 2023.